Are you tired of searching for methods to build a free website on the internet? Free website maker, Free website builder, and free website hosting is a marketing method that only exists for people to pay more later. Today, in this guide, I will explain some secrets only professionals know (Just Kidding).
If you have been searching through the internet on topics like How to build a website and Create a website for free. You might have come across the method to host and manage your site through a control panel like CPanel. You might also have come across, how you can use WordPress and many other Website Building Tools.
Today I will teach you something different from these methods. By using my way, you can host your blog or any kind of static website for free. I will cover Everything you need to know how to make a website for free.
Is Everything free?
Yes, but if you want, you can always pay according to how well your website performs later. But for now, Everything is free.
What will you get at the end of this article?
You will learn how to create and host your Blog and increase its security and performance. Everything for free, and you know what? People get charged more than $100+ for this. You will get your own blog/website hosted on the internet for FREE!
If people get charged, why create an article when you can charge people?
Many people don’t bother doing the technical stuff and pay for these things. Also, I’m not talking about the method of costing money. I’m talking about the services and knowledge you need to know.
What will I get at the end of the article? What will I learn?
You will learn how to create and host a website, secure your website, connect a domain name, connect a professional email address, making your website faster.
Besides a professional domain name (.com, .net, etc.), which costs $7.99(Cheapest rate + Privacy Protection) You will get Everything for free.
Why does a domain name cost money? You said Everything is free
Yes! I said, but It is only a one-time investment, and besides paying $9 a year for a brand name isn’t an expensive thing if you want your website to look professional. Also, If you want a domain name for free, I’ve got a method.
How to get a free domain name?
First, You need to choose a domain name if you want to build a website. A domain name is a unique address that you type on the address bar of browsers, which points the visitor towards your website, like rudrax.net (The domain name of my website), facebook.com, and google.com. If you want your website to look professional, you can always purchase the top-level domain names.
If you want to register a domain name for free, you can get some free domains (.ml, gq, .tk, .cf, .ga) from Freenom. If you don’t like using these free domain names, you can get a free sub-domain name.
Note: Due to these domain names being free many people are using them for spamming and illegal things. So, rarely any people trust these domain names.
Now let’s Get Started!
Create a Free Website From Netlify and Github.
Step #1: Getting a Domain Name and Connecting it using Cloudflare.
This step is optional if you plan to use a free sub-domain name. You can get a free sub-domain name from Netlify. In this step, You will be connecting your domain name to Cloudflare.
The benefits of Cloudflare.
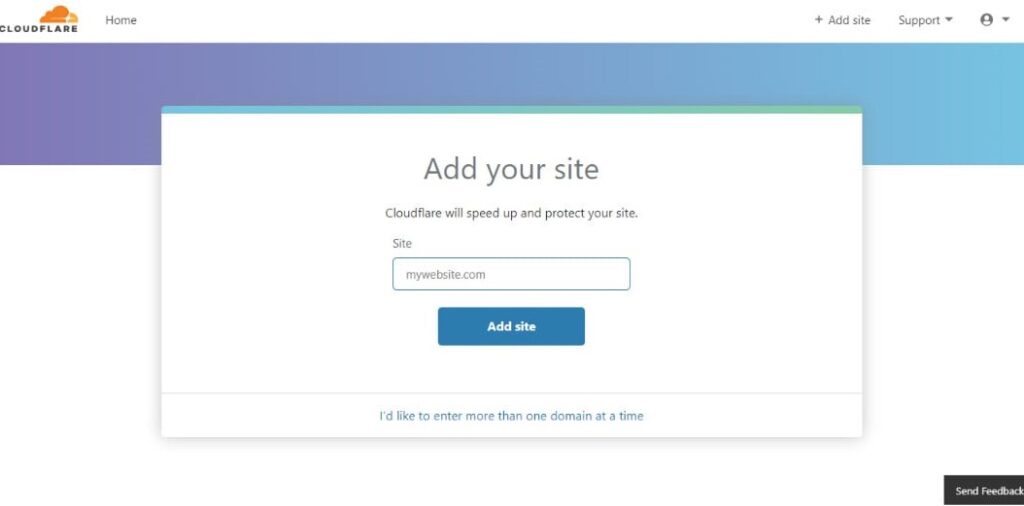
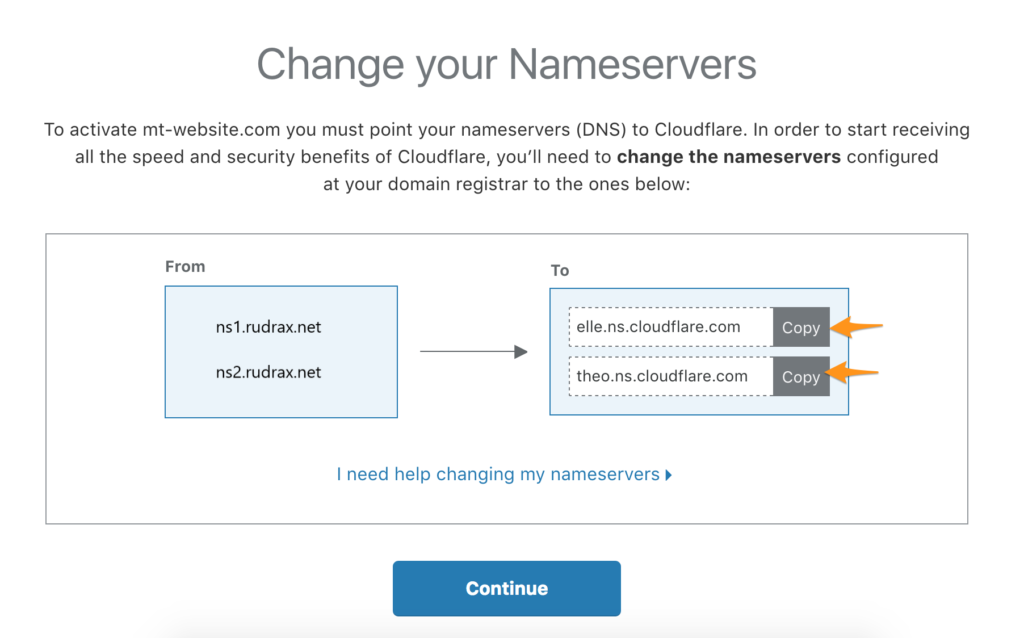
Cloudflare is a CDN service that also offers DDoS protection, Free SSL, and traffic acceleration. Go to Cloudflare and Signup for a free plan. Then enter your domain name. Cloudflare will provide you the nameservers, and you need to add them to your domain name. Go to your registrar’s website and change the nameservers.
Step #2: Setting up Github
GitHub is a code hosting platform for version control and collaboration. Go to the website and signup for a free account.
Step #3: Setting up Netlify
Netlify is a static web hosting service. You can host your static website for free on Netlify. I keep on saying “Static Website,” but what is it? A static website contains Web pages with fixed content. They are made by using only HTML/CSS/Javascript. You cannot add a database integration feature because the website is Static, and the content on its page does not change.
What about Blogs?
Blog hosted on Netlify is generated through static website generators like Jekyll and Gatsby. Before being Published, the static website is produced. You don’t need to worry about the static website generators for now. You can pick a template and use it on Netlify. Signup for a free Netlify account.
Step #3: Picking a Template/Theme and Setting Up
After you registered on Netlify, you need to upload your website. If your website is Static and contains only HTML/CSS, you can directly upload them on Netlify’s Dashboard. If you are using templates for static site generators, you need to upload them to GitHub and connect your GitHub account with Netlify.
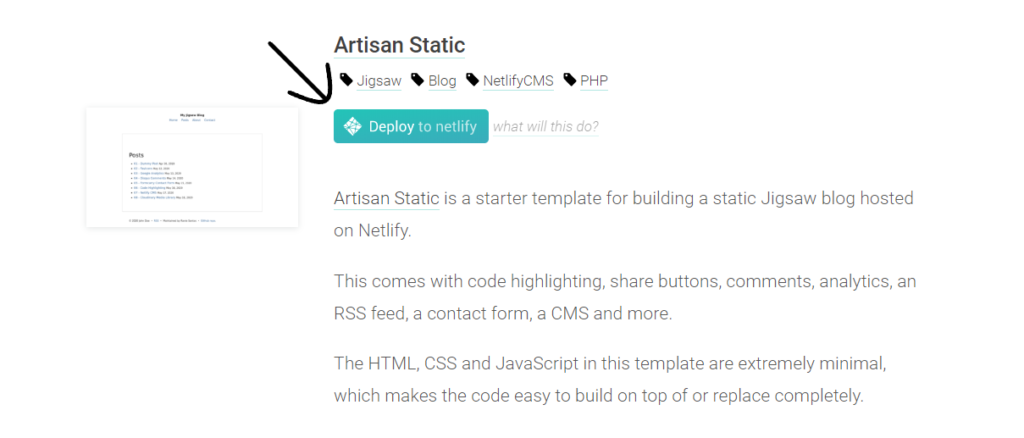
First, Choose a Template from these wonderful websites: Netlify, Jamstackthemes, and Gatsby. From the Netlify website, you can directly deploy your website. Click on deploy, and connect your GitHub account. Deploy your theme—the whole process with complete in a few minutes. You will get a free subdomain name in the process.
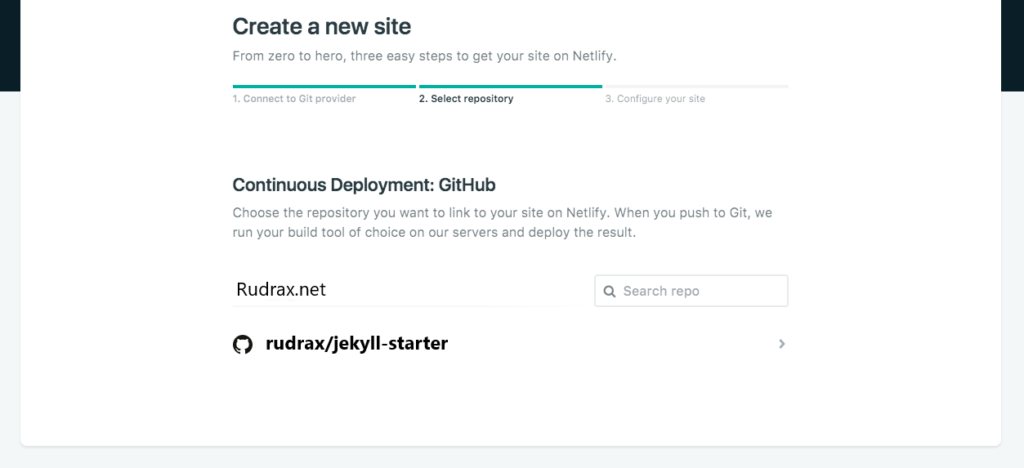
If you want to use templates from Gatsby and other static website generators, fork the template’s repo and connect it with Netlify. You can also download it on your computer and upload it in Github, then connect Netlify with Github.
Step #4: Connect Netlify and Cloudflare
Go to Netlify Dashboard > Your Website > Site Settings > Domain Management > Custom Domains and add your domain name. Then copy the IP address for the A record by clicking Check DNS Configuration. Go to your Cloudflare account, go to your domain, select DNS, and add a DNS record.
Choose A record, write @ in the Name field and add the IP address on the IPv4 Field. Save the DNS Record by clicking on Save.
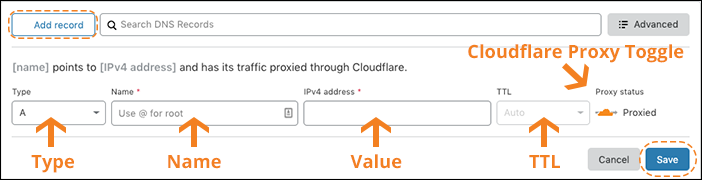
Yay! Your free website and domain name are now connected.
Step #5: Google Analytics and Other Things
As your website is now accessible through the domain name, you might want to view how many visitors you are receiving. Google Analytics helps you achieve that goal.
To activate google analytics, go to Analytics Dashboard, Sign In with your Google account. Create a new property and enter your domain name. You will be provided with a tracking code, and you just need to copy that.
What to do next?
Now go to your Netlify Dashboard > Your Website > Site Settings > Build and Deploy
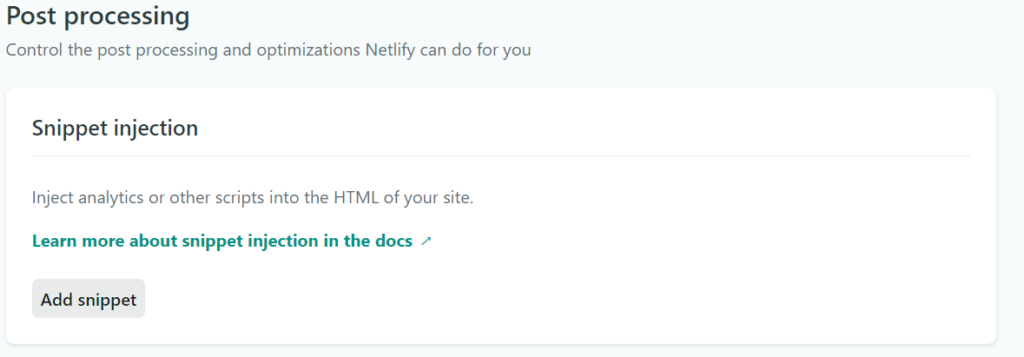
Now scroll down to Post-processing > Snippet Injection > Add Snippet
and paste your analytics code. You can give the script name whatever you like, so you will know that it’s your analytics code when you see it later.
Next steps?
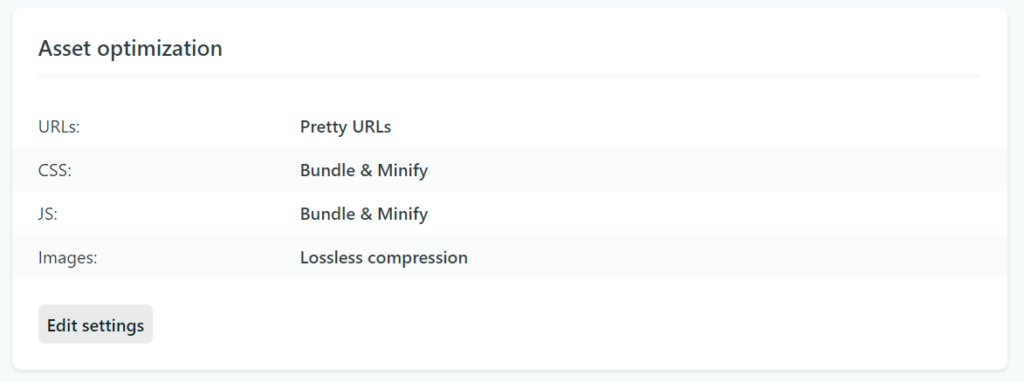
Now, at the bottom of the Snippet Injection, there is an option called asset optimization. Click Edit and enable all the optimization. This option will minify all your codes and assets, and your website will have less load time. Now, your website is SUPER Ready!
Step #6: Free email address
Now, you have a working website and a domain name. What about an email address? To look professional, you require a custom email address. You can get a free email address from Zoho. Just log in to their website and follow the instructions. You might need to add some TXT records in your domain’s DNS in Cloudflare.
If you did Everything as mentioned in this article, You might have a fully functional and secure website for Free. Please comment on what you didn’t understand, and I will try my best to help you.
Thank You for reading this article. Stay awesome, and Stay Safe!